

The introduction of iOS 17 has been met with enthusiasm for its new features and enhancements, yet some users are confronting an unexpected obstacle: their microphone ceasing to function correctly post-update. This can be a significant disruption for anyone relying on their device for communication, whether it’s for everyday conversations, business communications, or media creation. In addressing this issue, we will explore a variety of troubleshooting steps in detail, from the simple to the more complex. Ensuring that your device’s microphone permissions are set correctly, checking for physical blockages, and even exploring advanced settings are among the solutions that will be discussed. By methodically applying these recommended actions, users can often rectify the problem without the need for professional repair services. Stay tuned as we unravel these critical steps that could help you swiftly restore your microphone’s functionality and maintain the seamless performance of your iOS device.
Key Takeaways
- Verify microphone functionality by checking for physical barriers and debris, using the Voice Memos app, and testing during phone calls, FaceTime calls, and video recording.
- Grant necessary microphone permissions by going to Settings > Privacy > Microphone and toggling on permissions for specific apps.
- Disconnect Bluetooth devices that may cause audio input interference by going to Settings > Bluetooth and unpairing the device.
- Restart your iPhone by turning it off and on again to troubleshoot microphone issues.
- Clean microphone ports using a dry toothbrush or cotton swab, being careful not to push debris further into the ports, and test microphone clarity afterwards.
Verify Microphone Functionality
To verify the functionality of your iPhone’s microphone after the iOS 17 update, start by ensuring that any screen protectors, films, or cases are not obstructing the microphone ports and that there is no debris clogging the openings. This preliminary check is crucial to rule out any physical barriers that may cause microphone issues.
Next, to test your microphone, utilize the Voice Memos app to record a quick audio clip. Upon playback, if your voice is clear, this indicates that the microphone is working correctly. Should you encounter unclear sound or no sound at all, check if the microphone permissions are enabled for the specific apps you’re experiencing issues with by navigating to Settings > Privacy > Microphone.
If the problem persists when making phone or FaceTime calls or while using the speakerphone function, try recording a video and speaking into the microphone at the top of your iPhone. Review the playback to ensure your voice is audible. These steps will help you diagnose and rectify most common microphone issues without the need for more complex solutions.
Grant Necessary Permissions
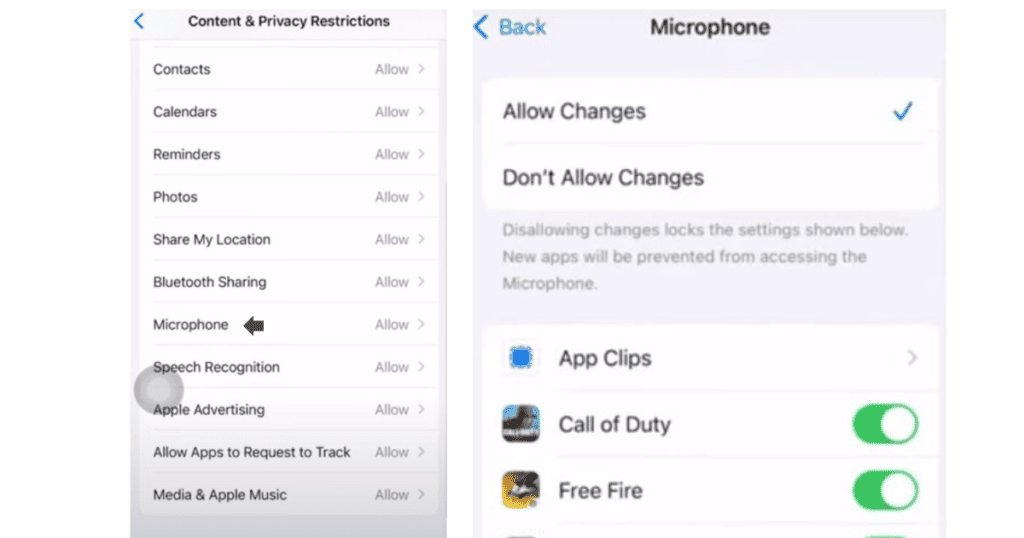
Having established that your iPhone’s microphone hardware is unobstructed and functional, it’s important to ensure that individual apps are granted the necessary permissions to utilize this feature. After the iOS 17 update, if you find that your microphone is not working with a specific app, it’s likely that the app doesn’t have the required permission to access your microphone.
Here’s a simple table to guide you through the process of granting permissions:
| Step | Action |
|---|---|
| 1 | Go to Settings > Privacy |
| 2 | Tap on Microphone |
| 3 | Toggle next to the app to grant permission |
Make sure the toggle switch next to the desired app is turned on. This action will allow the app to use the microphone, potentially resolving any issues you’ve been experiencing with that app. Remember, some apps may not request permission until they are first launched. In such cases, follow any prompts provided by the app to grant the necessary permissions. Granting app permissions is a critical step in ensuring your apps can function properly with your iPhone’s microphone.
Disconnect Bluetooth Devices
When troubleshooting microphone issues on an iPhone after an iOS 17 update, it is crucial to consider any connected Bluetooth devices that might be commandeering the audio input. These devices can sometimes take over the microphone functionality, leading to the impression that the iPhone’s built-in microphone is malfunctioning. To resolve this, users should disconnect their Bluetooth devices to ensure that the iPhone reverts to its internal microphone.
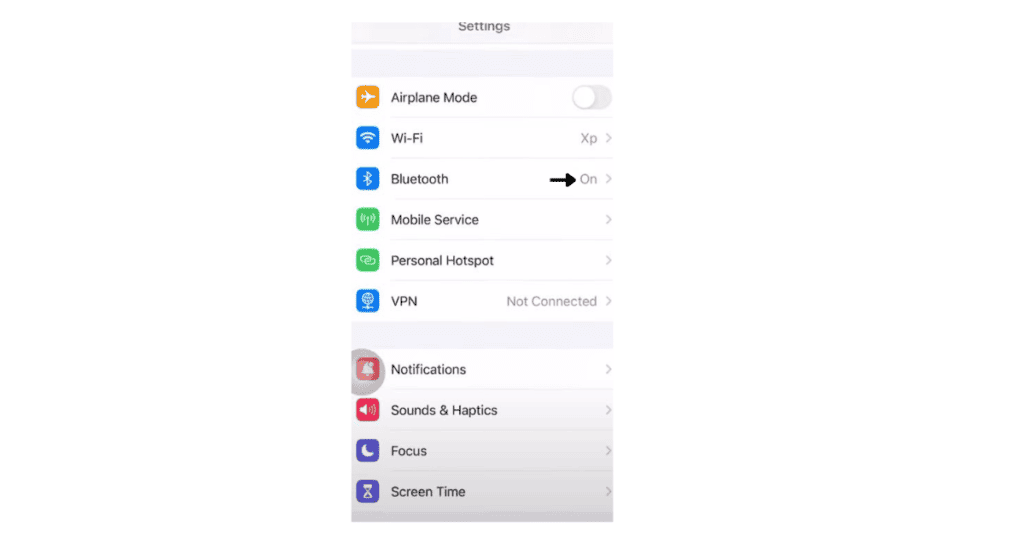
To disconnect Bluetooth devices, navigate to the iPhone’s Settings and select Bluetooth. Here, a list of connected devices will be displayed. Users should find the device they suspect might be causing the issue, tap on the More Info button next to it, and then select “Forget This Device”. This action will unpair the device from the iPhone.
After successfully disconnecting the Bluetooth devices, users should test the microphone once again. If the microphone begins to work properly, the issue was likely due to the external device. Should problems persist, users may attempt to reconnect their Bluetooth devices and verify if the microphone’s functionality is restored. Disconnecting Bluetooth devices is a simple yet effective step in troubleshooting audio input problems following an iOS update.
Restart Your iPhone

After addressing potential Bluetooth interference, it’s advisable to restart your iPhone as this can often remedy persistent microphone issues by resetting system processes and clearing temporary glitches. The act of restarting your device is a straightforward and reliable method for resolving various technical problems that may arise after an update to iOS 17.
To restart your iPhone, you should first close all open applications to ensure a clean reboot. Then, press and hold the side or top button until the “slide to power off” slider appears. Drag the slider, and wait for a few seconds for your iPhone to turn off completely. After the screen goes dark, press and hold the side or top button again until you see the Apple logo, indicating that your iPhone is restarting.
Once your iPhone has restarted, test the microphone functionality across different applications such as Siri, Voice Memos, and FaceTime. This will confirm whether the restart has resolved the issue. Restarting your iPhone is a quick, effective step to take before moving on to more complex troubleshooting procedures. It is often recommended as a first-line solution for addressing post-update iOS bugs and malfunctions.
Clean Microphone Ports
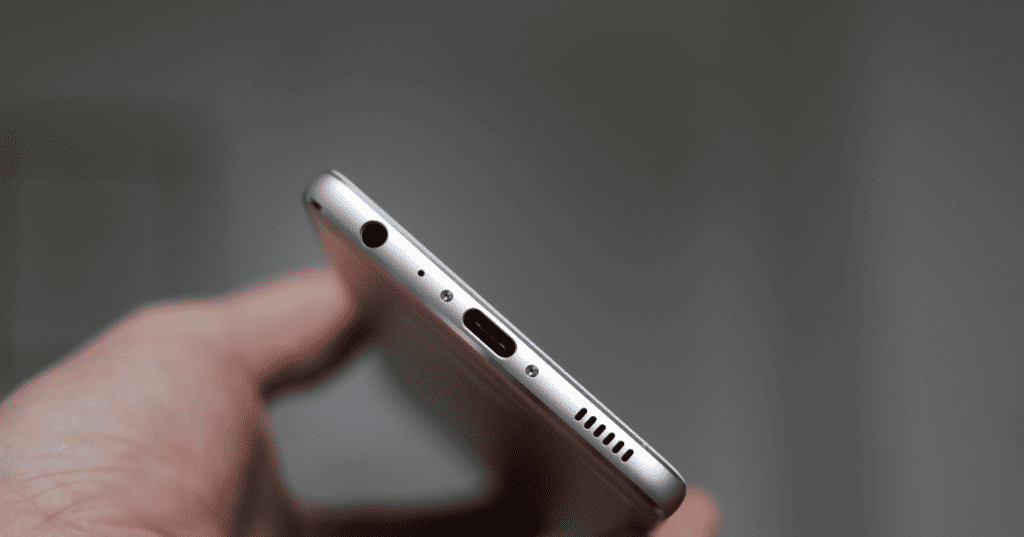
An often-overlooked yet critical step in troubleshooting microphone issues on an iPhone after an iOS update is to meticulously clean the microphone ports to eliminate any dust, debris, or blockages that might impair sound input. Over time, your iPhone’s microphone ports can accumulate debris, which can block the microphone and affect its performance. Therefore, ensuring that these ports are free of any obstruction is essential for the microphone to function correctly.
To clean microphone ports, use a dry toothbrush or a cotton swab, gently brushing away any visible particles. Take care not to push the debris further into the port. Make sure to check that the microphone is not being covered or blocked by any protective cases or coverings, as these can sometimes obstruct the ports inadvertently.
After cleaning, it’s important to test the microphone to confirm if the issue has been resolved. You can do this by making a phone call or recording a video clip to check for sound clarity. If the microphone is still not working, the blockage might not be the cause, and further troubleshooting steps should be taken. Remember, keeping the microphone ports clean is a simple yet effective maintenance step for optimal iPhone performance.
Update Ios Software
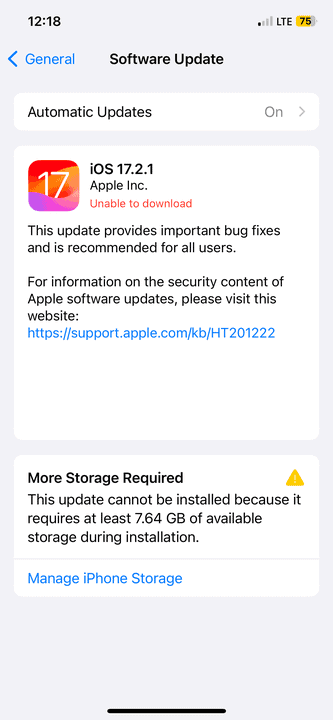
Updating your iOS software to the latest version can sometimes resolve persistent microphone issues by implementing the latest bug fixes and improvements from Apple. It’s crucial to ensure that your device is running the latest iOS to maintain optimal performance and functionality. Here’s how you can update iOS software:
- Check for Updates:
- Go to Settings > General > Software Update.
- If an update is available, you will see an option to ‘Download and Install’.
- Download and Install:
- Tap ‘Download and Install’ to begin the update process.
- Ensure your device has sufficient battery life or is connected to a power source.
- Wait for the download to complete and the installation process to begin automatically.
Reset Iphone Settings
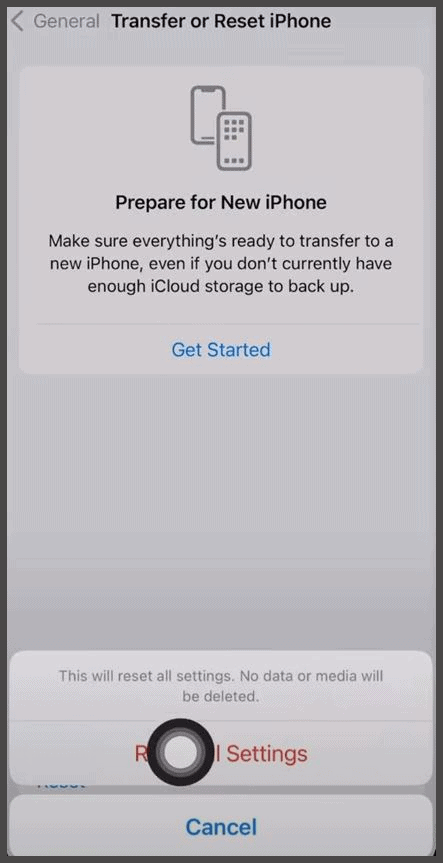
Resetting your iPhone’s settings to their default values is a recommended troubleshooting step when facing persistent microphone issues following an iOS 17 update. This process can address software glitches that may have arisen during the update process without erasing your personal data like photos, messages, and apps. To perform this action, navigate to your iPhone’s Settings, proceed to General, and then locate the Reset option. From there, you should tap on ‘Reset All Settings’, which will initiate the process of restoring system configurations to their original state.
It’s important to understand that while resetting all settings won’t result in the loss of personal data, it will remove all personalized system preferences, including Wi-Fi networks, Bluetooth connections, privacy settings, and any customizations you’ve made to your home screen layout or system settings. After the reset, you will need to reconfigure these settings according to your preferences.
Once the reset is complete, it’s crucial to test the microphone functionality to confirm if the issue has been resolved. If problems persist, you may consider a factory reset as a more drastic step, though this will completely erase all content on your iPhone. Before opting for a factory reset, ensure that you have backed up all necessary data to avoid any loss of important information.
Conclusion
In conclusion, post-iOS 17 microphone malfunctions can often be remedied through systematic troubleshooting. Ensuring functionality, granting requisite permissions, severing connections with Bluetooth devices, and restarting the device constitute initial corrective measures. Maintaining port cleanliness and executing software updates are critical, while a settings reset may serve as a panacea for persistent issues. Users are encouraged to traverse these temporal steps with alacrity to reinstate optimal device performance and reestablish effective communication conduits.